The more I work with Fortigates, the more I like the idea of a UTM - they're streamlined and everything is in one place, managed from a easy-to-access webGUI. I was poking around on eBay for stuff and stumbled upon a Watchguard Firebox x1250e for a reasonable $50 price tag; I thought to myself why not!?. When I got it I fiddled around with Fireware 10.2 which was on it already, and quickly learned why the company I work for doesn't touch these devices - they're terrible to manage. Quickly disappointed, I decided to get pfSense up and running on it - this way I can do whatever I want and indulge the Lego-builder inside me - RAM/CPU upgrades and open source software! Woo!
I found discrepancies between different walkthroughs online on how to go about doing this so I thought it'd be a good idea to jot it all down here; for both your and my benefit.
 You can use a 2.5'' HDD or a CF card to boot pfSense - I'm only going to be going over the CF card bit as I didn't have any 2.5's laying around.
On that note, the stock BIOS has an issue where it won't boot CF cards larger than 512MB; unfortunately for me the smallest card I had that I was willing to spare for this project was 1GB. To remedy this, we flash a new BIOS using FreeDOS!
So lets get started!
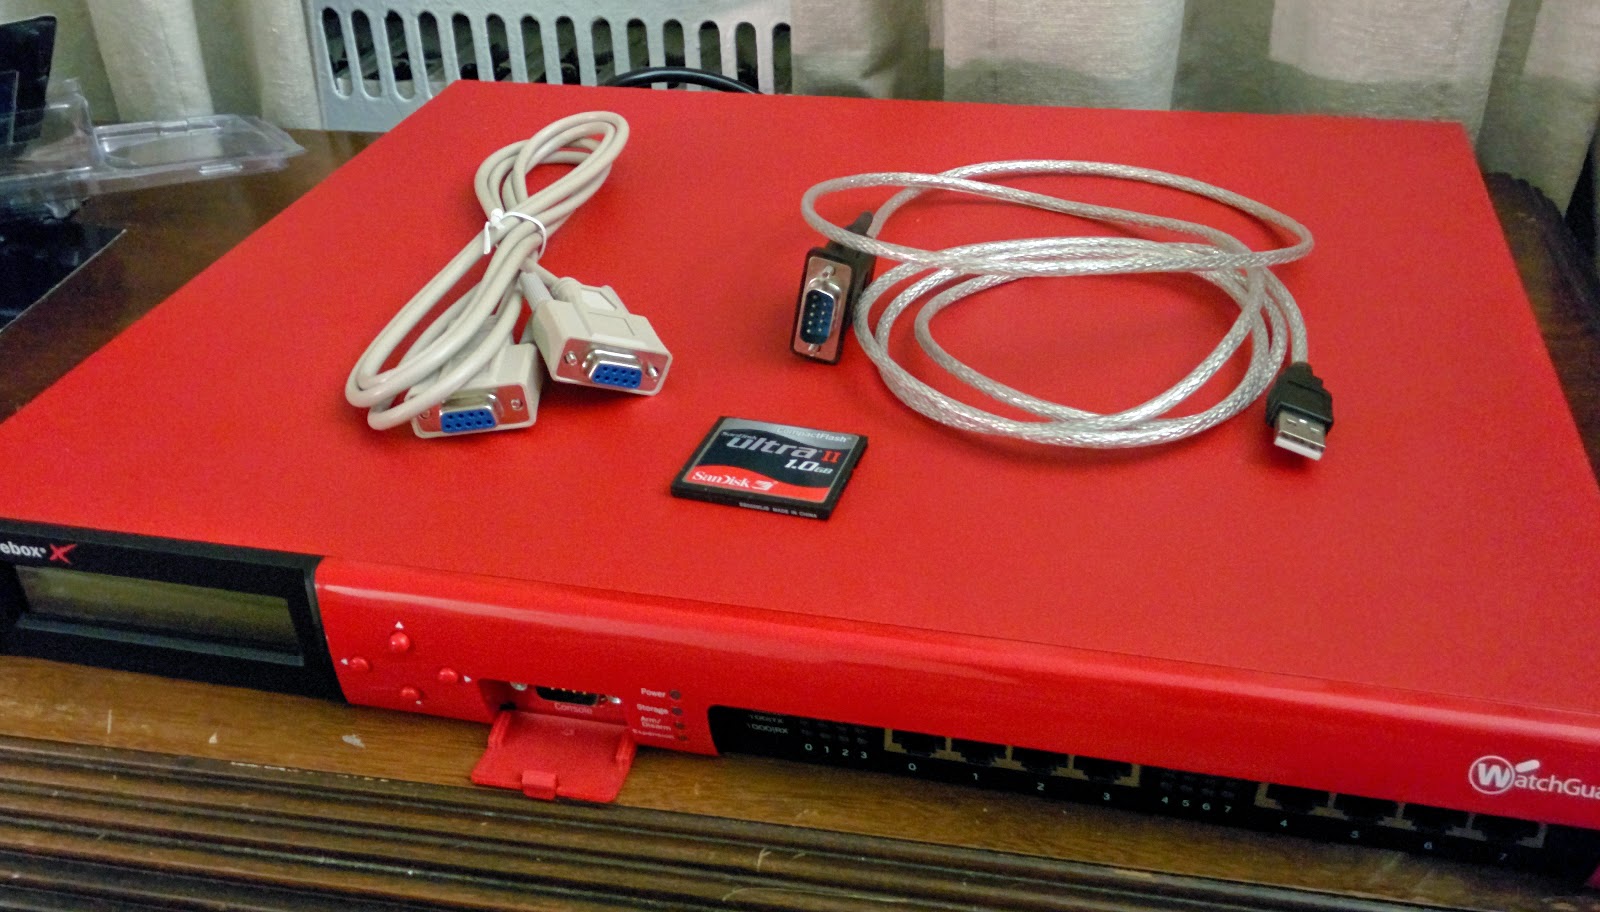
Rip open the case by removing the 14 screws from the sides/back of the chassis. Remove the stock CF card (mine was a 256MB SanDisk), image the default CF card with FreeDOS (which you can find here.) using the software of your liking; I used Win32DiskImager.
This would be a good time to plug in your USB-to-Serial & Null Modem cables to the Console port on the front of the Firebox - you need a DB9 cross-over cable (aka null modem); female serial will not work. The default settings for most terminal emulators should be fine at this point (I use Tera Term) however the settings you'll need are:
Baud rate: 9600
Date: 8 bit
Parity: none
Stop: 1 bit
Flow control: none
Insert the CF card back into Firebox and power it on
Should see a C:\> prompt
Change to the BIOS directory
Flash the new BIOS with the following command: awdflash x750eb7.bin /py /sn /cc /e
The x750e model is identical to the x1250e
Once the prompt returns, you can power off the device.
Once the prompt returns, you can power off the device.
While it's powered off , go to the pfSense directory and download the appropriate and newest image for pfSense, For my 1GB card I downloaded pfSense-2.1.5-RELEASE-1g-i385-nanobsd.img.gz (note the card size referenced in the image name). You can swap out the CF card once you image it.
While it's booting press Tab to enter the BIOS as we're going to need to change some settings (yes it says to hit del but we're going through a terminal emulator, trust me, hit Tab). Select Standard CMOS Features, from here select IDE Channel 0 Master [SanDisk SDCFJ-256] and change the following settings:
IDE Channel 0 Master [Manual]
Access Mode [CHS]
Head [2]
This BIOS does not support thermal-control for the three really noisy fans you might've noticed at the back of the chassis; if you would like to make them a little bit quieter select PC Health Status and set CPU Fan PWM value to [AA] (do not set it to lower than 0xAA [0x00-99] as it wouldn't POST for me and you'll have to reset the CMOS and do everything over again). Caution: adjusting the fans may lead to over-heating if your delta temperatures are already above average.
After you're happy with your settings hit Save and Exit from the main menu.
It should now re-POST then boot straight into pfSense's main menu! Hooray! If you get something that says "Empty or corrupt config.xml" the imaging didn't work or you have a bad CF card. In my case, I had to re-image the disk and it worked the second time around (that's what happens when you're too lazy to check hashes!)

You can go through the small menu to set up the initial interfaces, a note though: it will say you can access the web GUI through the WAN port - this is incorrect, by default it is not allowed for security reasons and you'll have to go in through a trust port (LAN).
WatchGuard was my dream IT certification but I was not having required time to study the syllabus. Then I downloaded Pass4sure WatchGuard dumps from Dumpspass4sure that gave me a very short description of the material. It didn’t take much time to go through the syllabus with Pass4sure WatchGuard questions and answers. I am thankful for this priceless service.
ReplyDeleteWatchGuard Sample Questions Answers is providing the most useful material among all the dumps materials. It has helped many people to pass their exam throughout the world. My all endeavors without WatchGuard Updated Questions were unsuccessful so I chose it and aced the exam. I will prefer it for all the next exams because it is fully satisfied for me.
ReplyDeleteActual Exam Dumps Questions Answers